Guides
CyberPanel malware scanner setup with Shelltrap
Install a host-level malware scanner on a stock CyberPanel server: requirements, signed packages, report-only first, and per-domain policies.
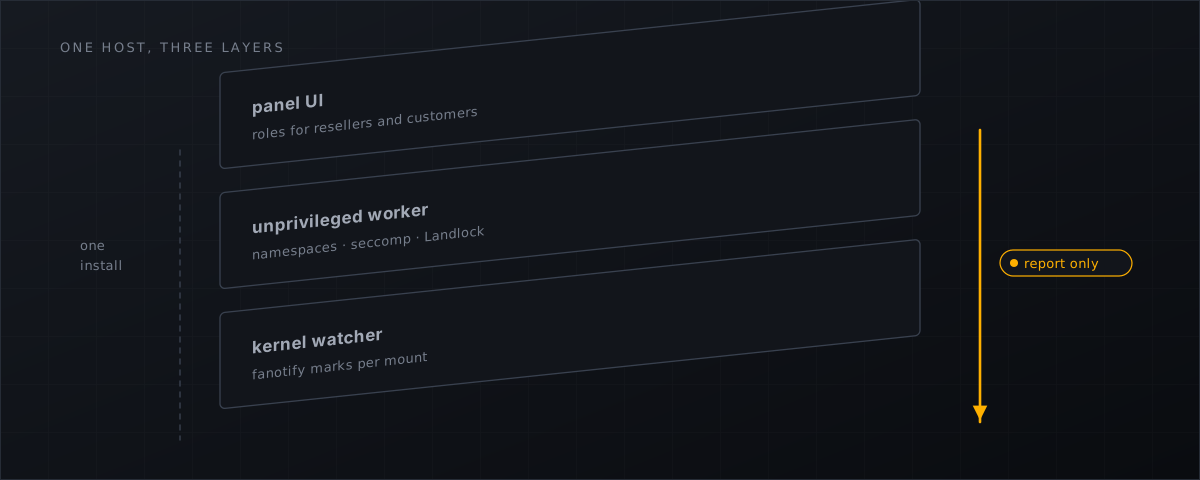
CyberPanel ships no malware scanner of its own, and the documented alternatives all come with a condition. This guide is the practical path to a host-level scanner on a stock CyberPanel box, in the order we actually do it: nothing enforcing on day one, everything visible.
Why this is awkward on CyberPanel in the first place
The panel’s own knowledge base sets out the supported route, verbatim :
Imunify360 is available with CyberPanel v2.0.0, but before using it you need to convert your operating system to CloudLinux OS.
That is a paid licence plus a commercial OS conversion — two purchases and a disruptive migration for anyone on stock AlmaLinux or Ubuntu. The free tier does not fill the gap either: Imunify’s own documentation lists ImunifyAV’s supported panels as cPanel, Plesk and DirectAdmin , and CyberPanel is not among them. The panel’s commercial add-on bundle contains no security scanner. And the product that used to occupy this slot for a one-time fee, ConfigServer’s cxs, closed with its vendor on 31 August 2025 — the background is in what CyberPanel operators should do next .
So the honest summary is: there is no officially supported, real-time malware scanner for a stock CyberPanel server. People do run Imunify unofficially; that is a different statement from it being supported.
Before you install: what the host needs
From the installation documentation:
- Root access. The broker runs as root; the scanner worker runs as the login-less user
shelltrap-scan. - A supported OS: Ubuntu 20.04 / 22.04 / 24.04, AlmaLinux / RockyLinux / RHEL 8, 9 or 10, CloudLinux 8 or CentOS 9. Debian is third-party support in CyberPanel and is not promised.
- A Linux filesystem under your customer roots (
/homeby default) on which the installer can actually probe the fanotify and file-handle capabilities. A kernel version number is not accepted as proof of capability — the runtime probe decides. - For the Full scanning profile: a running or installable
clamdwhose Unix socket is reachable by theshelltrap-scanuser — a root-only socket is not enough — and at least 1.5 GiB ofMemAvailableleft after the measured reload reserve. If those conditions are not met the installer selects the Lite profile, writesscanner.enable_clamd = false, and the reduced coverage is stated rather than hidden.
The installer prints a read-only preflight before it downloads anything — kernel, CAP_SYS_ADMIN, SELinux and AppArmor state, whether LiteSpeed is OpenLiteSpeed or Enterprise, and the real mount and filesystem behind /home. Nothing is started or reconfigured at that point.
Step 1: set resource limits before the daemon exists
The package starts the service as part of installation, so put your limits in place first. These are the values we used on our own first production host; treat them as a starting point sized to that machine, not as a recommendation for yours:
install -d /etc/systemd/system/shelltrapd.service.d
cat >/etc/systemd/system/shelltrapd.service.d/10-limits.conf <<'EOF'
[Service]
CPUQuota=200%
IOWeight=50
Nice=10
MemoryHigh=6G
MemoryMax=8G
EOF
systemctl daemon-reload
The vendor unit is never edited; own limits belong in a drop-in.
Step 2: install with the PHP adapter switched off
sudo env SHELLTRAP_SKIP_PHP_ADAPTER=1 apt-get install shelltrap shelltrap-cyberpanel
# RPM hosts:
sudo env SHELLTRAP_SKIP_PHP_ADAPTER=1 dnf install shelltrap shelltrap-cyberpanel
SHELLTRAP_SKIP_PHP_ADAPTER=1 prevents the package from writing auto_prepend_file into any lsphp configuration and from restarting LiteSpeed. No website is touched. The variable has to be set in the environment of the package manager call, because that environment is passed through to the maintainer scripts.
Packages are published with a SHA-256 file and a detached GPG signature per artefact. Verify both before installing a local file:
gpgv --keyring /usr/share/keyrings/shelltrap-archive.gpg \
  dist/shelltrap_1.2.3_amd64.deb.asc dist/shelltrap_1.2.3_amd64.deb
Because installation restarts the daemon immediately, there is a short window in which the default actions apply — quarantine on signature and hash hits. If you want no exposure to that window at all, the report-only policy can be seeded into the state database before the package is installed; that is the sequence our own test-stage procedure uses.
Step 3: activate the licence
shelltrap license activate STL-XXXXX-XXXXX-XXXXX-XXXXX-XXXXX
shelltrap license status
Activation binds the licence to a server fingerprint derived from /etc/machine-id and returns an Ed25519-signed token that the daemon verifies offline. A systemd timer renews it daily with jitter. Without a valid token the daemon does not crash and does not loop: it reports unlicensed, the watcher keeps counting events without scanning them, and the upload gate answers allow with the reason unlicensed.
Step 4: force report-only, then start
shelltrap policy set global signature.action=report hash.action=report \
  heuristics.action=report upload.enabled=false
shelltrap policy get global
systemctl enable --now shelltrapd
Every hit now produces a finding and a notification and changes nothing on disk. During the first week we also leave the weekly full-scan timer off, so the only load on the box is event-driven:
systemctl disable --now shelltrap-scan.timer
Step 5: verify what you actually got
shelltrapd --config /etc/shelltrap/shelltrap.toml --check | python3 -m json.tool | head -40
shelltrap health
shelltrap status
stat -c '%a %U:%G %n' /run/shelltrap/api.sock /run/shelltrap/upload.sock
Read both tier and diagnostic.tier in the --check output. Tier A means the full fanotify watcher with file-handle reporting; B, C and D are documented degradations, and D means there is no real-time watcher at all on this host. An explicitly configured backend can make the top-level tier reflect your choice rather than the machine’s capability, which is exactly why the diagnostic field exists.
shelltrap health reporting degraded is an operating fault, not a clean scan. Common early causes are a missing feed generation and a clamd socket the worker cannot reach.
Step 6: install the CyberPanel plugin
The shelltrap-cyberpanel package carries the panel integration; the panel’s own installer wires it in:
cd /usr/local/CyberCP
/usr/local/CyberCP/bin/python \
  /usr/local/CyberCP/pluginInstaller/pluginInstaller.py install --pluginName shelltrap
cat /var/lib/shelltrap/plugin-status.json
That status file is the authoritative check, not the installer’s own success message: it says ok only for a valid HTTP 200 health response over the Unix socket. After any CyberPanel upgrade, re-run the packaged repair path:
sudo /usr/share/shelltrap-cyberpanel/install.sh
The plugin is a user interface, not a second scanner. If the panel breaks, the broker and its workers keep running.
Step 7: policies per domain
Policies inherit global → account → domain, and the plugin shows the origin of every effective value. Administrators can change everything; resellers and users may only touch released keys on their own domains, and upload.on_error and heuristics.action stay locked for both — a boundary the broker enforces independently of the UI.
The keys you will actually use: signature.action, hash.action, heuristics.action, heuristics.threshold, upload.enabled, upload.on_error, upload.timeout_ms, upload.max_size, realtime.enabled, scan.window, scan.exclude, notify.targets, quarantine.retention_days, findings.retention_days.
Per domain, over the local socket:
curl --silent --show-error --unix-socket /run/shelltrap/api.sock -X PUT \
  -H 'Content-Type: application/json' \
  -H 'X-Request-ID: 37700c8fcf884a98b89337a6e4593a60' \
  --data '{"signature.action":"quarantine"}' \
  http://localhost/v1/policies/domain/42
Promote domains individually. A managed customer site whose owner will phone you is a good first candidate; a legacy site full of unmaintained plugins is a bad one.
Step 8: enable the upload gate, later
When the findings have stopped surprising you, run the package configuration again without the skip variable so the adapter is written for every lsphp version present:
sudo dpkg-reconfigure shelltrap      # Debian / Ubuntu
sudo dnf reinstall shelltrap         # RPM
The maintainer script touches CyberPanel’s .lsphp_restart.txt marker and then restarts LiteSpeed gracefully; a forced killall -9 lsphp is never used. Note that a site’s .user.ini can override auto_prepend_file, in which case the asynchronous watcher remains the catch-all. The decision logic, timeouts and the fail-open default are covered in how the PHP upload gate works
.
Removing it again
sudo apt-get remove shelltrap-cyberpanel shelltrap
Configuration, state, logs and quarantine survive removal. Quarantine is evidence, so even purge only deletes it behind an explicit gate:
sudo SHELLTRAP_PURGE_QUARANTINE=1 apt-get purge shelltrap
What this means for CyberPanel operators
- Install in report-only mode and leave it there for at least a week; the first week’s tuning is described in the report-only first week .
- Check
tier,diagnostic.tierand the chosen scanner profile immediately after installation — a Lite profile on a memory-tight box is a coverage decision you should know about, not discover later. - Promote domains from
reporttoquarantineone at a time, and keep quarantine retention long enough to answer questions; see quarantine or delete . - Enable the upload gate only after the findings are boring, and keep
upload.on_erroratopenunless you have a specific reason to fail closed for a specific domain. - Full command reference, package verification and the removal paths live in the installation docs .
Shelltrap is licensed per server, activated with one command, and never sends your customers’ files anywhere. See pricing .
Frequently asked
Do I have to convert to CloudLinux OS?
Not for Shelltrap. That requirement comes from CyberPanel’s documented Imunify360 route, which states that Imunify360 is available with CyberPanel v2.0.0 but that you need to convert the operating system to CloudLinux OS first. Shelltrap installs on stock Ubuntu, AlmaLinux, RockyLinux, RHEL, CloudLinux 8 or CentOS 9.
Will installing it break my customers' sites?
The first installation is deliberately inert: the PHP upload adapter is skipped, actions are set to report, and nothing is quarantined. You enable enforcement later, per domain, once you have looked at a week of findings.
What happens if the licence expires?
The daemon does not crash or loop. It reports status unlicensed with a reason, the watcher keeps counting events but nothing is scanned, the scheduler plans no work, and the upload gate answers allow with the reason unlicensed.
Sources
Every number, date and vendor claim in this article links to one of these.
- CyberPanel knowledge base — how to install and use Imunify360 on CyberPanel — accessed 2026-09-04
- ImunifyAV documentation — supported control panels — accessed 2026-09-04
- CyberPanel add-ons (commercial add-on bundle) — accessed 2026-09-04
- Way to the Web / configserver.com closure announcement, archived 30 July 2025 — accessed 2026-09-04
More from the research desk
Shelltrap on cPanel: what works today, what is beta
cPanel/WHM support landed in Shelltrap 0.3.0. What is identical to the CyberPanel build, what is deliberately different, …
ComparisonsCXS alternatives in 2026: the honest field guide
ConfigServer closed on 31 August 2025. What replaced cxs, what the options cost as at 4 September 2026, and what runs on …
AnalysisCXS is gone: what CyberPanel operators should do next
Way to the Web closed on 31 August 2025. csf survived via GPLv3 forks, cxs did not. What that means for a stock …
Shelltrap watches the files this article is about
Real-time detection, an upload gate in front of your PHP, explainable verdicts, and nothing leaving your server.